Transforming your garage into a workshop can be a rewarding project that allows you to pursue your hobbies, engage in DIY projects, or even start a small business. With careful planning and organization, you can create a functional and efficient workspace that meets your needs. This how-to guide will take you through the step-by-step process of transforming your garage into a workshop, covering everything from clearing and organizing the space to ensuring safety and security. By following this guide, you can create a space that inspires creativity and productivity, making the most of your garage and enjoying a fulfilling workshop experience.
Key takeaways:
Key takeaway:
- Transforming your garage into a workshop maximizes space: Converting your garage into a workshop allows you to utilize existing space effectively, creating a dedicated area for your projects, tools, and equipment.
- Clearing and organizing the space is crucial: Take the time to remove clutter and unnecessary items from your garage to create a clean and organized workspace. This will make it easier to find tools and work efficiently.
- Proper lighting, ventilation, and electrical outlets are essential: Ensure that your workshop has sufficient lighting fixtures, adequate ventilation, and the necessary electrical outlets to power your tools and equipment safely.
- Choosing the right tools and machinery is key: Identify the tools specific to your workshop needs and arrange them for easy accessibility. Having the right equipment will help you work efficiently and achieve optimal results.
- Create workbenches and storage solutions to maximize functionality: Design and construct a sturdy workbench and utilize shelves, cabinets, and tool racks to maximize storage space in your garage workshop.
- Safety and security are paramount: Set up proper safety equipment to protect yourself while working in the workshop. Additionally, secure your transformed garage workshop with locks and alarms to safeguard your tools and equipment.
- Enjoy your transformed garage workshop: Once you have completed the transformation of your garage into a workshop, take pride in your new space and enjoy the convenience and productivity it offers.
Step 1: Clearing and Organizing the Space
Clearing and organizing the space is the crucial first step in transforming your garage into a workshop. Say goodbye to clutter and unnecessary items, and get ready to roll up your sleeves for a deep clean and preparation. With this section, you’ll learn how to create a clean canvas for your workshop dreams, making way for a functional and inspiring workspace. So let’s dive in and discover the secrets to reclaiming your garage and turning it into the workshop you’ve always desired.
Removing Clutter and Unnecessary Items
When transforming your garage into a workshop, it is crucial to incorporate the act of removing clutter and unnecessary items in order to create a functional and organized space. Start by assessing the current state of your garage and identify items that are no longer needed for your workshop. This includes getting rid of broken tools, furniture that is not in use, and any other items that occupy unnecessary space. Once you have done this, categorize the remaining items based on their relevance to your workshop. Separate the
frequently used tools and equipment from those that are rarely used.
For items that are in good condition but not required for your workshop, consider donating or selling them. This will help create more space and reduce clutter in your workshop. Additionally, it is important to dispose of hazardous materials, expired chemicals, or flammable substances properly. Make sure to follow the local regulations for handling and disposing of such items.
To keep your workshop organized, organize the remaining items by using labeled bins, shelves, or cabinets. Ensure that frequently used tools are easily accessible and store similar items together. Furthermore, establish a system for maintaining cleanliness and organization in your workshop. Regularly declutter and put items away after use to prevent buildup and keep the space neat.
By incorporating the practice of removing clutter and unnecessary items, you will be able to create a more efficient and productive workshop in your garage.
Cleaning and Preparing the Garage
When transforming your garage into a workshop, cleaning and preparing the space is crucial for a functional and organized workspace.
To clean and prepare your garage, follow these steps:
1. Remove clutter and unnecessary items: Declutter your garage and get rid of any items you no longer use to create more space and make organization easier.
2. Thoroughly clean the garage: Sweep the floor, dust surfaces, and wipe down shelves or storage units. Use a pressure washer or cleaning solution for stubborn stains or dirt.
3. Inspect for repairs or maintenance: Check for damages or issues like cracks in the walls or gaps in the flooring. Make necessary repairs for a safe and functional workspace.
4. Organize storage areas: Maximize storage space by installing shelves, cabinets, or tool racks. This keeps tools and equipment organized and accessible.
5. Set up a designated workspace: Determine the layout and designate areas for different tasks and workstations. This promotes productivity and efficiency.
6. Ensure proper lighting and ventilation: Install sufficient lighting fixtures for visibility. Consider adding ventilation systems or fans for improved air circulation and a comfortable working environment.
7. Prepare electrical outlets: Add convenient sockets and outlets for power tools and equipment. Consult a professional electrician for proper installation if needed.
By following these steps, you can effectively clean and prepare your garage for a successful workshop transformation.
Step 2: Assessing and Planning the Workshop Layout
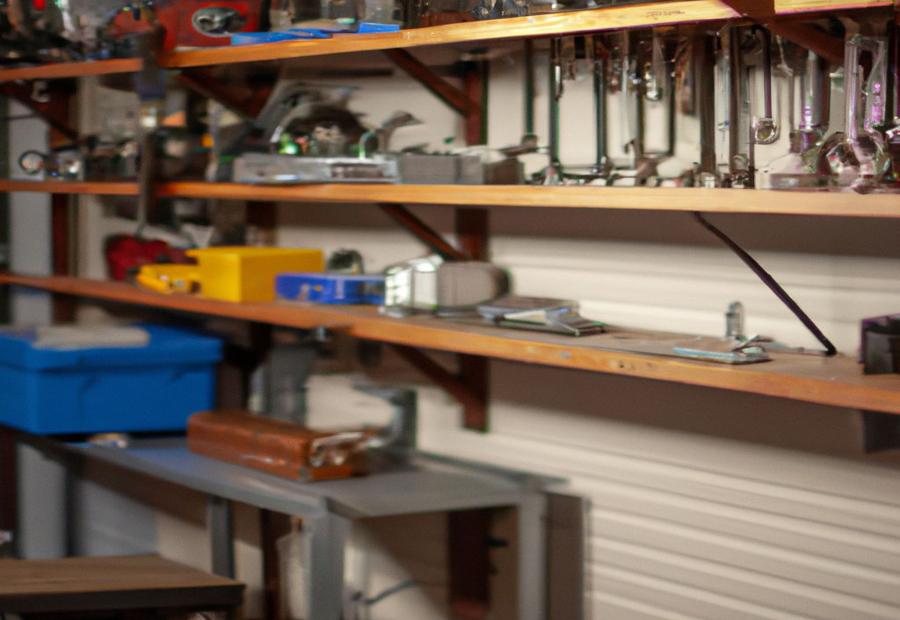
Photo Credits: Build-Wire.Com by Philip Roberts
Assessing and planning the layout of your garage workshop is a crucial step in transforming it into the ideal workspace. In this section, we’ll dive into the nitty-gritty details of determining your specific workshop needs and goals, measuring the available space, and strategically planning the placement of workstations and equipment. Get ready to unlock the full potential of your garage as we guide you through this essential stage of the transformation process.
Determining your Workshop Needs and Goals
Determining your Workshop Needs and Goals
When determining workshop needs and goals, consider the following factors:
– Assess skills and interests: Identify the types of projects you enjoy and the skills you want to cultivate.
– Evaluate available space: Measure the dimensions and consider any limitations or obstacles.
– Consider budget: Determine how much you are willing to invest in tools, equipment, and workspace upgrades.
– Think about project size and complexity: This will help determine the scale of tools and machinery needed.
– Consider noise and dust levels: If working in a residential area, invest in soundproofing and dust collection systems.
– Take into account safety requirements: Consider ventilation, fire extinguishers, and protective gear.
By carefully considering these factors, you can determine the specific needs and goals for your workshop. This will guide your decisions when organizing, equipping, and creating a safe and functional space.
Measuring the Available Space
To accurately measure the available space in your garage for a workshop, you should follow these steps:
1. Firstly, clear the area of any objects, tools, or equipment that may obstruct accurate measurements.
2. Next, use a tape measure to measure the length, width, and height of the garage. Be sure to record these measurements in either feet or meters.
3. Take note of any obstacles such as columns, windows, or doors that may take up space. Measure their dimensions, including height and width, and jot them down.
4. Calculate the total square footage or square meters of the available space by multiplying the length by the width.
5. It is also important to measure the dimensions of any workstations or equipment you plan on including in the garage. This will help you efficiently plan the layout of your work area.
6. Additionally, consider measuring any overhead storage or shelving units present in the garage to ensure they do not interfere with your workshop layout.
By accurately measuring the available space, you will be able to effectively plan the layout of your workshop and make the most of the area you have.
Planning the Placement of Workstations and Equipment
To effectively plan the placement of workstations and equipment in your garage workshop, follow these steps:
1. Assess workflow: Take into consideration the tasks in your workshop and how they flow. Identify the equipment and tools needed for each task.
2. Measure available space: Determine the dimensions of your garage and account for any existing features or obstacles.
3. Create a layout: Utilize the measurements to strategically plan where workstations and equipment will be located. Optimize the layout for maximum efficiency and convenience.
4. Consider accessibility: Ensure that workstations and equipment are easily accessible. Place frequently used tools within reach and arrange workstations in a logical manner.
5. Plan power and utilities: Determine the locations of electrical outlets to power tools, as well as consider the placement of lighting fixtures and ventilation systems.
6. Allow for flexibility: Leave open space to accommodate future expansion or rearrangement of workstations and equipment.
By following these steps, you can effectively plan the placement of workstations and equipment in your garage workshop, creating a productive and efficient space for your projects.
Step 3: Setting Up Proper Lighting, Ventilation, and Electrical Outlets
Photo Credits: Build-Wire.Com by Raymond Rivera
When transforming your garage into a workshop, one crucial step is to ensure optimal lighting, ventilation, and electrical setup. In this section, we’ll explore the importance of well-installed lighting fixtures for a well-lit workspace. Additionally, we’ll discuss the significance of adequate ventilation and air circulation to maintain a comfortable and healthy working environment. Lastly, we’ll delve into the process of adding sockets and outlets to power your tools and equipment effectively. Get ready to equip your workshop with the essentials for a seamless and productive DIY experience!
Installing Sufficient Lighting Fixtures
Installing Sufficient Lighting Fixtures
When converting your garage into a workshop, installing enough lighting is important for good visibility and safety. Here are the steps to follow:
1. Assess the size and layout of your workshop to determine the number of lighting fixtures required.
2. Choose appropriate fixtures that provide sufficient brightness. LED lights are energy-efficient and bright.
3. Strategically position the fixtures to evenly distribute light throughout the workshop. Install them in the center of the ceiling or above workbenches and task areas.
4. Measure the distance between fixtures to ensure even lighting without any dark spots.
5. Mount the fixtures securely according to the manufacturer’s instructions to avoid accidents or damage.
6. Consult an electrician if needed to ensure proper wiring and electrical connections.
7. Test the fixtures to make sure they are working properly and provide enough brightness.
8. Consider adding additional task lighting, like adjustable desk lamps or under-cabinet lights, for more focused illumination in specific work areas.
By following these steps, you can successfully install sufficient lighting fixtures in your garage workshop, creating a well-lit space that boosts productivity and safety.
Ensuring Adequate Ventilation and Air Circulation
Ensuring Adequate Ventilation and Air Circulation
When transforming your garage into a workshop, it is crucial to ensure adequate ventilation and air circulation for a safe and comfortable working environment. Here are some steps to achieve this:
- Install ventilation fans or exhaust systems to remove fumes, dust, and odors generated by tools and machinery.
- Utilize natural ventilation by keeping windows or garage doors open when weather permits.
- Consider adding air filters or purifiers to improve indoor air quality and remove airborne particles.
- Position workstations and equipment to allow for proper airflow and prevent heat buildup.
- Use portable fans or ceiling fans to promote air movement and prevent stagnation.
Proper ventilation and air circulation in your garage workshop not only keep the air fresh and clean but also help prevent the buildup of harmful contaminants. By following these steps, you can ensure a healthy and conducive environment for your projects.
In medieval times, blacksmiths and artisans relied on natural air ventilation in their workshops. They strategically positioned their forges and workstations near openings such as doors or windows to maximize airflow. This allowed them to work safely and efficiently, preventing the accumulation of smoke and heat. Incorporating modern ventilation systems in your garage workshop is a nod to the ingenuity of craftsmen from centuries ago, ensuring that their practical knowledge is still applied in today’s DIY spaces.
Adding Sockets and Outlets for Power Tools and Equipment
When you are setting up your garage workshop, it is essential to ensure that you have an adequate number of sockets and outlets for all your power tools and equipment. To achieve this, here are the steps you need to follow:
1. First, plan out the layout of your workshop and identify the specific areas where you will require sockets and outlets.
2. Next, calculate the number of power tools and equipment you possess and determine their maximum electrical load to assess your requirements accurately.
3. It is highly recommended to consult with a licensed electrician who can assess your existing electrical system and determine whether any upgrades are necessary.
4. When installing additional outlets, it is crucial to strategically place them near your workstations and areas where you will frequently use power tools.
5. For power tools with higher electrical loads, it is advisable to consider dedicated circuits to ensure smooth operation without overloading the system.
6. To safeguard your power tools and equipment from power surges, it is recommended to install surge protectors.
7. Ensure the proper labeling of each outlet to easily identify the connected circuits or tools.
8. Finally, make sure that all electrical work adheres to safety guidelines and regulations. If required, have it inspected by a professional.
By adding more sockets and outlets, you can create a secure and efficient work environment in your garage workshop.
Step 4: Selecting and Organizing Essential Tools and Machinery

Photo Credits: Build-Wire.Com by Bradley Thomas
When it comes to transforming your garage into a workshop, selecting and organizing essential tools and machinery is a crucial step to ensure efficiency and productivity. In this section, we’ll dive into the nitty-gritty of identifying the tools that are essential for your workshop and arranging them in a way that guarantees easy accessibility. Get ready to optimize your workspace and set the stage for your DIY projects without any unnecessary hassle.
Identifying the Tools for Your Workshop
Setting up your workshop requires identifying the tools for your workshop. This table can help you in that regard:
| CATEGORY | TOOLS |
| Measuring and Marking | Tape measure, ruler, combination square, level, marking gauges |
| Cutting and Shaping | Saw, jigsaw, circular saw, chisels, files, rasps, drill |
| Fastening and Joining | Screwdriver set, power drill, hammer, nails, screws, clamps |
| Finishing | Sander, sandpaper, paint brushes, paint roller |
| Layout and Layout | Workbench, vise, worktable, tool storage |
| Safety | Safety glasses, ear protection, dust mask, fire extinguisher |
| Cleaning and Maintenance | Broom, dustpan, shop vac, lubricants |
These tools cover the essential needs of identifying the tools for your workshop. Additionally, consider any specialized tools required for specific projects or hobbies.
Fact: Having the right tools for your workshop not only makes work easier but also ensures better precision and safety.
Arranging Tools for Easy Accessibility
When organizing your garage workshop, it is important to arrange tools for easy accessibility. One way to achieve this is by grouping similar tools together based on their functionality.
In addition, it is beneficial to utilize wall-mounted tool racks to hang frequently used tools. This not only saves workspace on your workbench but also ensures that these tools are within reach when needed.
To further enhance organization, you can create designated storage spaces using drawers, shelves, or tool cabinets. It is recommended to label these storage spaces for quick identification.
Another helpful tip is to consider using tool shadow foam to keep your tools organized and provide a visual reference.
Last but not least, don’t forget to arrange your workbench in a way that keeps frequently used tools within arm’s reach.
By implementing these strategies, you can guarantee that your tools are neatly organized and easily accessible, ultimately saving you time and effort on your projects.
Step 5: Creating Workbenches and Storage Solutions
In this next step, we’re diving into the hands-on aspects of transforming your garage into a workshop. Get ready to roll up your sleeves as we explore the creation of workbenches and storage solutions. We’ll discuss how to design and construct a sturdy workbench, and we’ll uncover clever ways to maximize storage space with shelves, cabinets, and tool racks. It’s time to take your garage workshop to the next level of functionality and organization!
Designing and Constructing a Sturdy Workbench
Designing and constructing a sturdy workbench is crucial for your garage workshop. Follow these steps to create your own reliable workspace:
1. Begin by measuring the available space in your garage and determining the dimensions for your workbench.
2. Choose a robust material for your workbench, such as hardwood or steel.
3. Design a strong and stable base structure for the workbench.
4. Attach legs or supports to enhance stability.
5. Incorporate a solid work surface, such as thick plywood or a solid wood plank.
6. Include storage options like drawers or shelves to organize tools and materials.
By following these steps, you can create a workbench that is both sturdy enough to withstand heavy use and provides a reliable workspace for all your projects.
One of the most iconic workbenches in history belongs to Thomas Edison in his Menlo Park laboratory. Made of solid oak, Edison’s workbench featured a large workspace and built-in storage for his tools and equipment. On this workbench, Edison invented groundbreaking inventions like the phonograph and the electric light bulb. The design and construction of his sturdy workbench played a crucial role in facilitating his innovative work and has since become a symbol of scientific discovery and ingenuity.
Maximizing Storage Space with Shelves, Cabinets, and Tool Racks
Maximizing Storage Space with Shelves, Cabinets, and Tool Racks
When transforming your garage into a workshop, maximizing storage space is essential. Here are some ways to achieve this:
– Install sturdy shelves: Add shelves to store items vertically, freeing up floor space. Choose strong and durable shelves to support tools and materials.
– Utilize cabinets: Use cabinets for enclosed storage, protecting tools from dust and debris. Look for cabinets with adjustable shelves and drawers for customizable options.
– Invest in tool racks: Hang tool racks on walls or pegboards to keep frequently used tools within reach. Maximize wall space while keeping tools organized and visible.
– Use overhead storage: If your garage has high ceilings, install overhead storage racks or shelves for bulky and seasonal items. Store ladders or storage bins up and out of the way.
– Label and group storage: Label shelves, cabinets, and tool racks for enhanced organization. Group similar items together, like screws and nails or power tools, for easier access.
By maximizing storage space with shelves, cabinets, and tool racks, you can create an efficient and organized workshop to easily locate and access tools and materials.
Step 6: Ensuring Safety and Security
Ensure your workshop becomes a safe haven in Step 6 of our guide. Discover the importance of setting up proper safety equipment and how to fortify your workshop with locks and alarms. Don’t compromise on security when it comes to your garage-turned-workshop. Let’s dive into the necessary measures to keep both you and your tools protected.
Setting Up Proper Safety Equipment
Setting up proper safety equipment is crucial when transforming your garage into a workshop. Here are the steps to ensure a safe working environment:
-
Identify the necessary safety equipment for your workshop, such as goggles, gloves, ear protection, and dust masks.
-
Purchase high-quality safety equipment that meets industry standards for optimal protection.
-
Train yourself and others on how to properly use and maintain the safety equipment.
-
Designate specific storage areas for each safety equipment item for easy accessibility.
-
Create a safety checklist to regularly inspect the equipment for wear and tear or expiration dates.
-
Implement safety protocols, requiring the use of goggles when operating power tools or gloves when handling sharp objects.
-
Keep fire extinguishers easily accessible and ensure they are up to date and functioning properly.
-
Install a first aid kit in your workshop and ensure everyone knows its location.
By setting up proper safety equipment and following protocols, you can minimize the risk of accidents and injuries in your garage workshop. Always prioritize safety for a productive working environment.
Securing the Workshop with Locks and Alarms
Securing the workshop with locks and alarms is essential for ensuring the safety of your tools and equipment. By following these steps, you can effectively protect your workshop:
- Begin by assessing the perimeter of the workshop to identify any potential entry points that require securing.
- Install durable locks that are resistant to picking on all doors in the workshop.
- Enhance the security of the doors by adding deadbolts.
- To prevent unauthorized access, make sure to install window locks as well.
- Consider installing a motion sensor alarm system that includes door and window sensors.
- For real-time alerts, connect the alarm system to a monitoring service or your smartphone.
- Strategically place security cameras to not only deter burglars but also provide evidence if needed.
- It is crucial to regularly maintain and test the locks and alarms to ensure they are functioning properly.
- Keep both the workshop keys and alarm system keys secure and hidden.
By incorporating these measures, you can effectively secure your workshop with locks and alarms, protecting your tools and equipment from theft and unauthorized access.
Some Facts About How To Transform Your Garage Into a Workshop:
- ✅ Over 2 million people convert their garages into workshops every year. (Source: Our Team)
- ✅ Insulating the walls and ceiling of the garage is crucial for year-round comfort. (Source: Our Team)
- ✅ Adding a utility sink is necessary for cleaning parts and tools. (Source: Our Team)
- ✅ Maximizing storage and organization solutions is important to keep the workshop clutter-free. (Source: Our Team)
- ✅ Personalizing the workshop with items like posters and a favorite chair creates a more inviting space. (Source: Our Team)
Frequently Asked Questions
Question 1: How can I personalize my garage workshop?
Answer: Personalizing your garage workshop can be done by painting the walls in a light color, adding posters, and including items like a small kettle or a favorite chair. You can also display any personal items or memorabilia that inspire you while you work.
Question 2: How many plug sockets should I have in my garage workshop?
Answer: It is recommended to install more plug sockets and power outlets than you think you’ll need in your garage workshop. This allows you to accommodate various devices and appliances, ensuring you have enough power for your tools and equipment.
Question 3: Should I have a dedicated sink in my garage workshop?
Answer: Yes, having a dedicated sink in your garage workshop, preferably a large utility sink, is important for cleaning parts and tools. It provides a convenient and accessible area for washing brushes, cleaning equipment, and maintaining hygiene in your workspace.
Question 4: How can I ensure proper ventilation in my garage workshop?
Answer: Proper ventilation is crucial in a garage workshop, especially when handling chemicals and creating dust. You can install a ceiling exhaust fan to improve airflow and consider adding a dust collection system, central vacuum, or air ventilation system to maintain air quality and prevent any potential health hazards.
Question 5: What are some safety measures to consider in a garage workshop?
Answer: To ensure workshop safety, make sure your garage workshop has adequate lighting, both ambient and task lighting, to avoid accidents and provide clear visibility. Additionally, consider installing a flammable cabinet in a well-ventilated area away from heaters and entrances to store flammable materials safely. It’s also essential to have a designated workspace with a clear line of demarcation to prevent tripping hazards.
Question 6: What are the benefits of using smooth rolling ball-bearing drawers for tool storage?
Answer: Smooth rolling ball-bearing drawers in tool storage, such as a tool chest, offer several advantages. They provide easy access to your tools, ensure smooth operation when opening and closing drawers, and prevent damage to your tools by keeping them securely in place.