
Renovating a bathroom can be an exciting and rewarding project that can transform one of the most important spaces in your home. From planning to completion, each step requires careful consideration and attention to detail to ensure a successful renovation. This ultimate guide will take you through the entire process, providing valuable insights and tips to help you achieve your dream bathroom.
Introduction: Why Renovate Your Bathroom?
Before diving into the specifics, it’s essential to understand the reasons why you should consider renovating your bathroom. Whether you want to upgrade outdated fixtures, create a more functional space, or simply enhance the overall aesthetics, a bathroom renovation can add value to your home and improve your daily life.
Step 1: Assessing Your Bathroom
The first step in any renovation project is to assess the current state of your bathroom. This involves determining your renovation goals, evaluating your budget, and assessing the condition of your bathroom. By understanding these factors, you can set the foundation for a successful renovation.
Step 2: Planning Your Bathroom Renovation
Once you have assessed your bathroom, it’s time to start planning your renovation. This step includes setting a realistic timeline, designing your ideal bathroom layout, researching and selecting materials, and deciding whether to hire professionals or take a DIY approach. Planning is crucial to ensure a smooth and efficient renovation process.
Step 3: Obtaining Permits and Permissions
Depending on the scope of your renovation, you may need to obtain permits and permissions from local authorities. This step ensures that your renovation complies with building codes and regulations. It’s important to familiarize yourself with the necessary permits and go through the application process before starting any construction work.
Step 4: Demolition and Preparation
Before you can start bringing your renovation vision to life, you need to clear out the existing bathroom and make necessary preparations. This step involves removing fixtures and fittings, considering electrical and plumbing requirements, and making structural modifications if needed. Proper preparation sets the stage for a successful renovation.
Step 5: Bathroom Renovation Process
Once the preparation is complete, it’s time to begin the actual renovation process. This step includes installing new fixtures and features, tiling and flooring, painting and wallpapering, and ensuring proper lighting and ventilation. Each element contributes to the overall functionality and aesthetics of your new bathroom.
Step 6: Final Touches
The final touches are what bring your bathroom renovation together. Adding accessories and storage solutions helps optimize space and enhance functionality. Thorough cleaning and finishing touches ensure a polished and complete look.
Step 7: Completion and Aftercare
As your renovation nears completion, it’s important to thoroughly inspect and test your newly renovated bathroom. This step ensures that everything is in working order and meets your expectations. Maintaining and caring for your renovated bathroom will help prolong its lifespan and ensure its continued functionality.
Conclusion: Enjoying Your Newly Renovated Bathroom
Key takeaway:
- Renovating your bathroom maximizes functionality: A bathroom renovation allows you to create a space that meets your specific needs and preferences, enhancing the overall functionality of the room.
- Budgeting and planning are essential for a successful renovation: Assessing your renovation goals, evaluating your budget, and planning a realistic timeline are crucial steps to ensure a smooth and efficient bathroom renovation process.
- Hiring professionals ensures quality and saves time: While DIY renovations can be tempting, hiring professionals ensures expert craftsmanship, reduces the risk of mistakes, and saves time and effort in the long run.
Step 1: Assessing Your Bathroom
Before diving into the exciting world of bathroom renovation, let’s take the first step together: assessing your current bathroom. In this section, we’ll explore how to determine your renovation goals, evaluate your budget, and assess the condition of your bathroom. Get ready to uncover all the essential factors that will guide you towards a successful bathroom transformation.
Determining Your Renovation Goals
When determining your renovation goals for your bathroom, it’s important to have a clear vision of what you want to achieve. Consider the following factors:
- Functionality: Think about how you use your bathroom and what improvements would enhance its functionality. Do you need more storage space, better lighting, or a more efficient layout?
- Aesthetics: Consider the overall look and feel you want to create in your bathroom. Are you aiming for a modern, sleek design or a traditional, cozy atmosphere? Choose colors, materials, and fixtures that align with your desired aesthetic.
- Budget: Determine your renovation goals based on what is most important to you and stay within your financial means.
- Timeline: Consider the timeframe in which you want the renovation to be completed. This will help you plan accordingly and manage expectations.
- Resale value: If you plan on selling your home in the future, consider how the renovation will impact your home’s resale value.
To illustrate the importance of determining renovation goals, let me share a true story. A couple decided to renovate their small bathroom with the goal of optimizing space and creating a spa-like retreat. They prioritized functionality by installing a floating vanity and a walk-in shower with a rain showerhead. They also incorporated luxurious materials such as marble tiles and a freestanding bathtub. The result was a stunning bathroom that exceeded their expectations and added significant value to their home.
Evaluating Your Budget
When evaluating your budget for a bathroom renovation project, it’s important to consider various factors:
- Determine the total funds available for the renovation, including savings, loans, or other sources of financing.
- Make a list of all the elements you want to include in your renovated bathroom, such as new fixtures, tiles, flooring, and lighting.
- Research and compare prices of different materials and products to get an idea of the costs involved. Consider factors like quality, durability, and maintenance requirements.
- Prioritize your spending by identifying essential items and any areas where you can potentially cut costs.
- Set aside a contingency fund of around 10-20% of your total budget to account for unexpected expenses or changes in plans.
Evaluating your budget carefully will enable you to plan your bathroom renovation effectively and avoid overspending. It ensures that you have a realistic understanding of what you can afford and helps you make informed choices when selecting materials and fixtures. Remember, it’s essential to stick to your budget and avoid any unnecessary expenses to achieve a successful renovation without financial strain.
Fact: According to HomeAdvisor, the average cost of a bathroom renovation in the United States is around $10,000 to $15,000, but costs can vary significantly based on the size and complexity of the project, as well as the location.
Assessing the Condition of Your Bathroom
To assess the condition of your bathroom, follow these steps:
- Inspect the walls and ceilings for any signs of water damage, such as discoloration or peeling paint, while Assessing the Condition of Your Bathroom. This could indicate leaks or improper ventilation.
- Check the flooring for any cracks, chips, or loose tiles when Assessing the Condition of Your Bathroom. These can be safety hazards and may need to be repaired or replaced.
- Examine the fixtures, including the sink, toilet, and bathtub/shower, when Assessing the Condition of Your Bathroom. Look for signs of wear and tear, such as rust or leaks.
- Test the plumbing by running the faucets and flushing the toilet when Assessing the Condition of Your Bathroom. Make sure the water flows smoothly and there are no unusual sounds or odors.
- Evaluate the lighting in the bathroom when Assessing the Condition of Your Bathroom. Check if all the bulbs are working and if the lighting is sufficient for your needs.
- Assess the overall layout and functionality of the bathroom when Assessing the Condition of Your Bathroom. Consider if the current design meets your needs and if there is enough storage space.
- Take note of any specific issues or concerns you have regarding the condition of the bathroom when Assessing the Condition of Your Bathroom.
Pro-tip: It’s a good idea to create a checklist or take photos of the condition of your bathroom to refer back to during the renovation process when Assessing the Condition of Your Bathroom. This will help you prioritize tasks and communicate your needs to professionals if necessary.
Step 2: Planning Your Bathroom Renovation
When it comes to transforming your bathroom, proper planning is the key to success. In this crucial step of your renovation journey, we will dive into setting a realistic timeline, designing your dream bathroom, researching and selecting top-notch materials, and making the decision between hiring professionals or tackling the project yourself. Let’s get things in motion and create a plan that will make your bathroom renovation a seamless and enjoyable experience.
Setting a Realistic Timeline
When it comes to a bathroom renovation, setting a realistic timeline is crucial for a smooth and efficient process. Here are the steps you should consider:
- Evaluate the scope of the renovation and determine the amount of work involved.
- Research and gather information about the average duration of similar bathroom renovation projects.
- Take into account any additional factors that may impact the timeline, such as material availability or the need for specialized contractors.
- Seek input from professionals or experienced contractors to get their perspective on the estimated timeline.
- Break down the renovation process into specific tasks or milestones, and allocate a realistic timeframe for each one.
- Create a schedule or timeline chart to visually outline the entire renovation process.
- Regularly review and update the timeline as the project progresses, making adjustments if necessary.
It’s a fact: On average, a bathroom renovation project can take anywhere from two to six weeks, depending on the complexity of the renovation and the availability of resources.
Designing Your Ideal Bathroom
When designing your ideal bathroom, there are several steps to consider:
- Assess your needs: Determine what you want and need in your bathroom. Consider the size, layout, and functionality.
- Set a budget: Evaluate your finances and determine how much you are willing to spend on your bathroom renovation.
- Consider your style: Think about the overall look and feel you want for your bathroom. Research different design styles and choose one that suits your taste.
- Select materials: Research and choose the materials you want to use for your bathroom, such as tiles, countertops, fixtures, and lighting.
- Hire professionals or go DIY: Decide if you want to hire professionals to handle the renovation or if you want to do it yourself. Consider your skills, time availability, and budget.
By following these steps, you can create a well-designed bathroom that meets your needs and reflects your personal style.
Researching and Selecting Materials
When renovating your bathroom, researching and selecting materials is a crucial step that can greatly impact the overall outcome of your project.
| Materials | Considerations |
|---|---|
| Ceramic Tiles | Ceramic tiles are a popular choice for bathroom walls and floors due to their durability, water resistance, and a wide range of design options. |
| Natural Stone | Natural stone, such as marble or granite, adds a luxurious and elegant touch to your bathroom. However, it requires regular maintenance and can be more expensive. |
| For a budget-friendly option that is easy to install and maintain, vinyl flooring is a practical choice. It comes in various designs that mimic the look of natural materials. | |
| Proper lighting is essential for a functional and aesthetically pleasing bathroom. Flush mount lighting fixtures provide a sleek and modern look while illuminating the space. |
While selecting materials, it is important to consider factors such as durability, maintenance, cost, and design compatibility with the overall look you want to achieve. Additionally, ensure that the chosen materials meet all necessary safety and quality standards.
A true story that emphasizes the significance of researching and selecting materials involves a couple who decided to renovate their bathroom with inexpensive tiles. However, they did not consider the low durability and poor water resistance of the chosen tiles. Within a few months, the tiles started cracking and peeling off. This experience highlighted the importance of thorough research and selecting high-quality materials to ensure a successful and long-lasting bathroom renovation.
Hiring Professionals or Going DIY
When it comes to bathroom renovation, you have two options: hiring professionals or going the DIY route.
- Hiring professionals:
- Pros: Hiring professionals ensures that the job is done by experienced individuals who have the necessary skills and knowledge to handle all aspects of the renovation. They can provide expert advice, manage the project efficiently, and deliver high-quality results.
- Cons: Hiring professionals can be more expensive compared to doing it yourself. You will need to budget for their fees, which can vary depending on the scope of the project and the professionals you hire.
- Conditions: If you have a complex bathroom renovation that involves extensive plumbing or electrical work, hiring professionals is highly recommended to ensure compliance with building codes and to avoid costly mistakes.
- Going DIY:
- Pros: Going DIY can save you money on labor costs. It also allows you to have complete control over the design and execution of the project. Additionally, it can be a rewarding experience if you enjoy DIY projects.
- Cons: DIY renovations require significant time, effort, and skill. You need to have a good understanding of plumbing, electrical work, and construction techniques. Mistakes can be costly to fix, and the overall result may not be as professional-looking as if it were done by experts.
- Conditions: Going the DIY route is suitable for smaller-scale renovations, such as updating fixtures or cosmetic changes, where specialized skills are not required. If you have the necessary knowledge and experience, DIY can be a cost-effective option.
Ultimately, the decision between hiring professionals or going DIY depends on your budget, skills, and the complexity of the renovation. Consider your abilities, resources, and the level of expertise required to achieve the desired outcome for your bathroom renovation.
Step 3: Obtaining Permits and Permissions
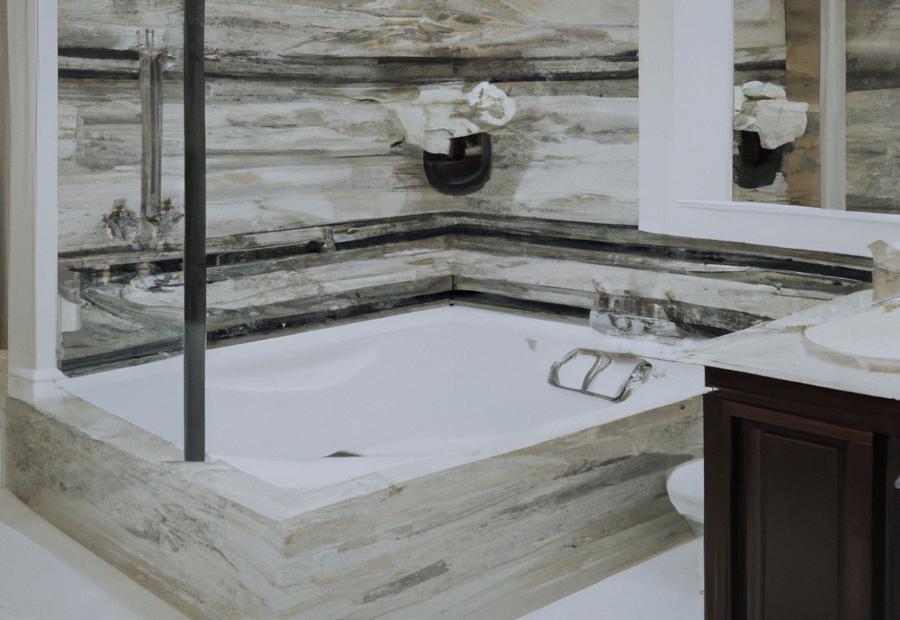
Photo Credits: Build-Wire.Com by Wayne Jackson
When embarking on a bathroom renovation project, obtaining permits and permissions is a crucial step that must be followed. Here are the steps to take in order to ensure compliance:
- Research local regulations and requirements:
Start by familiarizing yourself with the specific permits and permissions needed for your bathroom renovation in your area. This information can typically be found on the website of your local building department.
- Contact the appropriate authorities:
Reach out to your local building department to inquire about the necessary permits. Provide them with all the details of your renovation project, including the scope of work and any structural changes that will be made.
- Obtaining permits and permissions:
Prepare all the necessary paperwork for your permit application. This may include detailed plans, drawings, and specifications of the proposed changes. Make sure to fill out the application accurately and provide any additional information requested.
- Pay the permit fees:
Most permit applications require a fee, which is typically based on the value of the renovation project. Calculate the fees accurately and submit the payment along with your application.
- Wait for approval:
Once your application is submitted, it will be reviewed by the local building department. The approval process can take some time, so it’s important to be patient. Make sure to address any concerns or additional requirements raised by the department promptly.
- Receive the permits:
Once your application is approved, you will be issued the necessary permits and permissions for your bathroom renovation. These permits should be prominently displayed at the renovation site and easily accessible for inspections.
By following these steps, you can ensure that you have the proper permits and permissions in place before commencing your bathroom renovation project.
Step 4: Demolition and Preparation
Demolition and preparation, step four in the ultimate guide to bathroom renovation, is where the real transformation begins. Get ready to roll up your sleeves and clear out the old, making way for a fresh start. We’ll be diving into the nitty-gritty details of electrical and plumbing considerations, ensuring that everything is up to code. And don’t forget about waterproofing and structural modifications, because a solid foundation is key. Let’s go!
Clearing Out the Bathroom
When clearing out the bathroom for a renovation, it is important to follow a systematic approach to ensure a smooth and organized process:
- Clearing out the bathroom: Begin by taking out any personal items such as toiletries, towels, and decorations. Store them in a safe place to keep them away from the renovation area.
- Empty cabinets and vanity: Empty the cabinets and vanity, removing all items stored inside. This includes products, cleaning supplies, and any other items that may be present.
- Disconnect fixtures: Turn off the water supply and disconnect any fixtures in the bathroom, such as faucets, showerheads, and toilets. This ensures a safe and clean space for the renovation work.
- Protect surrounding areas: Cover the floors and other nearby areas with drop cloths or plastic sheets to prevent dust and debris from spreading. This will also protect surfaces from damage during the renovation process.
- Dispose of waste properly: If there are any old fixtures, tiles, or other materials that need to be removed, ensure they are disposed of properly. Consider renting a dumpster or hiring a waste removal service.
When clearing out the bathroom, it’s essential to prioritize safety and organization. Keep the area clean and free from clutter to facilitate the renovation process.
Electrical and Plumbing Considerations
During the bathroom renovation process, it is essential to take into account both electrical and plumbing considerations. These factors play a significant role in ensuring the functionality and safety of your newly renovated bathroom.
1. Electrical considerations: It is crucial to check if your electrical system can handle the additional load that comes with new fixtures and features. To do this, get in touch with a qualified electrician who can assess your current wiring and make any necessary upgrades. Make sure to install outlets in convenient locations for appliances like hair dryers and electric toothbrushes. Moreover, proper lighting should be thoughtfully installed to create a well-lit and comfortable bathroom environment.
2. Plumbing considerations: It is important to evaluate your existing plumbing system to ensure it can accommodate any changes or additions you plan to make. If you are relocating or adding fixtures such as sinks, showers, or toilets, it may require adjustments to the plumbing layout. Seek the guidance of a professional plumber to ensure proper installation and connection to the main water supply and drainage system.
By addressing these electrical and plumbing considerations, you can guarantee that your renovated bathroom meets both safety and functionality requirements. Remember to hire licensed professionals to handle any electrical or plumbing work to ensure compliance with building codes and regulations.
Waterproofing and Structural Modifications
Waterproofing and structural modifications are essential elements in the bathroom renovation process to guarantee the durability and safety of your recently renovated area.
When it comes to waterproofing, it is crucial to utilize top-quality waterproofing materials to prevent water damage and the growth of mold. By applying a waterproof membrane to the walls and floors, such as a liquid-applied membrane or a waterproofing sheet membrane, you can establish a protective barrier against water penetration.
To create a functional and visually appealing bathroom, it may be necessary to make structural modifications. This could involve the removal of walls to expand the space, strengthening the existing structure to accommodate additional fixtures or features, or changing the layout to enhance flow and usability.
Consulting with a professional is important to evaluate the structural integrity of your bathroom and determine the necessary modifications. They can offer expert guidance and ensure compliance with permits and regulations throughout the process.
By incorporating proper waterproofing techniques and implementing structural modifications as needed, you can achieve a renovated bathroom that not only boasts beauty but also maintains its durability and safety for years to come.
Step 5: Bathroom Renovation Process
Step 5 of our ultimate guide to bathroom renovation takes us into the exciting realm of the bathroom renovation process. Get ready to transform your space as we dive into installing new fixtures and features, tiling and flooring, painting and wallpapering, and ensuring proper lighting and ventilation. With each sub-section, we’ll unveil the essential steps and tips to ensure a successful and stunning bathroom renovation from start to finish. Let’s get this transformation underway!
Installing New Fixtures and Features
When it comes to installing new fixtures and features in your bathroom during a renovation, there are several essential steps to follow:
- Assess your current fixtures and features to determine what needs to be replaced or upgraded.
- Research and select the new fixtures and features that align with your design preferences and budget.
- Make sure to measure the dimensions of the new fixtures and features to ensure they will fit properly in your bathroom.
- Remove the old fixtures and features carefully, disconnecting any plumbing or electrical connections as needed.
- Prepare the area where the new fixtures and features will be installed, ensuring it is clean and free of any debris.
- Follow the manufacturer’s instructions for installing each specific fixture or feature, paying attention to any additional tools or materials that may be required.
- Connect the plumbing and electrical components of the fixtures and features, ensuring they are secure and functioning properly.
- Test each fixture or feature after installation to ensure they are working correctly.
- Make any necessary adjustments or repairs before completing the installation.
By following these steps, you can ensure a successful installation of new fixtures and features in your bathroom during your renovation.
Tiling and Flooring
Tiling and flooring play a vital role in any bathroom renovation. The choice of materials for tiling and flooring greatly influences the overall appearance and functionality of the space.
1. Opt for high-quality tiles: When selecting tiles, it is essential to choose ones that are durable and resistant to water. Porcelain and ceramic tiles are popular options for bathroom floors due to their ease of cleaning and maintenance. It is also recommended to go for non-slip tiles, particularly in wet areas, to ensure safety.
2. Consider the style and design: It is important to determine the desired style and aesthetic for your bathroom. Coordinating the colors and patterns of the tiles with the rest of the bathroom elements can create a cohesive look. Timeless neutral colors like white, gray, or beige can suit various styles.
3. Invest in professional installation: To ensure proper installation, it is advisable to hire experts specializing in tiling and flooring. Tiles and flooring that are correctly installed will be more durable and less prone to issues such as cracking or water damage.
4. Prioritize waterproofing: Before laying the tiles, it is crucial to install a waterproof membrane to prevent water from seeping through and causing damage to the subfloor. This step preserves the integrity of the tiles and flooring in the long run.
5. Choose easy-to-maintain flooring: Opt for flooring materials that are effortless to clean and maintain. Vinyl or laminate flooring can be a practical choice as they are water-resistant and require minimal care. Natural stone options like marble or granite can add a luxurious touch but may demand more maintenance.
When considering tiling and flooring for your bathroom renovation, it is crucial to prioritize functionality, durability, and aesthetics. By carefully considering these factors, you can create a beautiful and functional bathroom space that will withstand the test of time.
Painting and Wallpapering
When it comes to painting and wallpapering during a bathroom renovation, there are several important steps to consider:
- Prepare the walls: Begin by cleaning the walls thoroughly to remove any dirt or grease. Fill in any holes or cracks with spackling compound and sand them smooth. Use a primer to create a smooth surface for painting or wallpapering.
- Select your colors or patterns: Choose paint colors or wallpaper patterns that suit your desired aesthetic for the bathroom. Consider the overall style and mood you want to create, whether it’s a soothing spa-like atmosphere or a bold and vibrant design.
- Painting the walls: Apply a coat of paint evenly using a roller or brush. Start from the top and work your way down, being careful to avoid drips or streaks. Allow the first coat to dry completely before applying a second coat if necessary.
- Applying wallpaper: Measure and cut the wallpaper according to your wall dimensions. Follow the manufacturer’s instructions for applying adhesive and carefully smooth the wallpaper onto the wall. Use a wallpaper smoothing tool to remove air bubbles and ensure a seamless finish.
- Trim and edges: Use painter’s tape to protect any areas you don’t want to paint or wallpaper, such as baseboards or trim. Take care when painting along edges or corners to create crisp lines. Remove the tape before the paint or wallpaper dries completely.
- Finishing touches: Once the paint or wallpaper has dried, inspect the walls for any touch-ups or imperfections. Use a small brush to carefully fix any mistakes or blemishes. Clean up any drips or spills and remove any painter’s tape residue.
By following these steps, you can ensure a well-executed painting and wallpapering process during your bathroom renovation.
Lighting and Ventilation
When renovating your bathroom, it is crucial to consider lighting and ventilation. These two aspects play a significant role in creating a comfortable and healthy bathroom environment. Here are some key factors to keep in mind:
- Lighting: Proper lighting is essential in making your bathroom functional and inviting. It is recommended to install a combination of task lighting, such as vanity lights or recessed lighting, and ambient lighting, like a ceiling fixture or wall sconces. This will ensure adequate lighting for activities such as makeup application or shaving, while also creating a warm and inviting atmosphere.
- Ventilation: Good ventilation is crucial to prevent moisture buildup, mold, and mildew. Installing a ventilation fan will effectively remove steam and odors, keeping your bathroom fresh and dry. Make sure to choose a fan with the appropriate capacity for your bathroom size to ensure proper ventilation.
- Natural light: If possible, maximize the use of natural light in your bathroom by adding windows or skylights. Natural light not only enhances the overall aesthetic but also offers various health benefits, including mood enhancement and vitamin D synthesis.
- Dimmers: Incorporating dimmer switches for your bathroom lighting allows you to adjust the brightness according to your needs. This enables you to create different atmospheres for different times of the day, enhancing the overall ambiance of your bathroom.
Did you know that inadequate lighting and ventilation in bathrooms can contribute to poor air quality and increase the risk of respiratory issues? To maintain a healthy and comfortable bathroom environment, it is essential to prioritize proper lighting and ventilation.
Step 6: Final Touches
Get ready to put the finishing touches on your bathroom renovation journey with Step 6: Final Touches. In this section, we’ll explore the exciting sub-sections of Adding Accessories and Storage Solutions and Cleaning and Finishing Touches. From selecting the perfect accessories to adding those final clean and polished details, we’ll guide you through the last steps of your bathroom transformation. So, let’s dive in and make those final touches that will bring your vision to life!
Adding Accessories and Storage Solutions
When it comes to bathroom renovations, incorporating accessories and storage solutions can greatly enhance both the functionality and aesthetics of the space. Here are some options to consider:
- Shelving units: Add floating shelves or wall-mounted cabinets to provide additional storage for towels, toiletries, and decorative items
- Over-the-toilet storage: Utilize the space above the toilet by incorporating an over-the-toilet storage unit or shelving to keep bathroom essentials within easy reach
- Medicine cabinets: Choose a stylish medicine cabinet with mirrors on the exterior and extra storage space inside for storing medications and small bathroom items
- Towel racks and hooks: Install towel racks or hooks near the shower, bathtub, and sink for convenient access to towels and robes
- Bathroom organizers: Use drawer dividers, trays, and caddies to keep your toiletries and cosmetics neatly organized
- Baskets and bins: Place decorative baskets or bins on shelves or under the sink to corral smaller items like hair tools, cleaning supplies, and spare toilet paper
- Wall-mounted hooks: Hang hooks on the back of the bathroom door or on the wall to hang bathrobes, towels, or clothing
- Shower caddies: Consider installing a shower caddy to keep shampoo, conditioner, and other shower essentials neatly organized and easily accessible
- Decorative accents: Incorporate accessories like plants, artwork, or decorative trays to personalize the space and make it visually appealing
By incorporating these accessories and storage solutions, you can maximize the functionality of your bathroom while adding style and organization to the space.
Cleaning and Finishing Touches
When it comes to cleaning and finishing touches for your bathroom renovation, there are a few key steps to follow:
- Clear out any debris and clean the surfaces thoroughly. This includes removing old caulk, grout, and any leftover materials from the renovation process.
- Apply fresh caulk or grout to seal any gaps and give your bathroom a polished look. This will also help prevent water damage and mold growth.
- Install new fixtures, such as towel bars, toilet paper holders, and shower curtains or doors. These cleaning and finishing touches can elevate the overall look and functionality of your bathroom.
- Consider adding storage solutions, such as shelves or cabinets, to keep your bathroom organized and clutter-free.
- Give your bathroom a final deep cleaning to ensure that it is sparkling and ready to use. This includes cleaning the floors, mirrors, and other surfaces.
Story:
After completing their bathroom renovation, Sarah and Mike were excited to see the cleaning and finishing touches come together. They carefully cleaned every corner of their newly renovated bathroom, making sure it was spotless and ready for use. They installed sleek and modern fixtures, which added a touch of elegance to the space. To maximize storage, they added a stylish wall-mounted cabinet and a floating shelf. Finally, after a thorough cleaning, Sarah and Mike stepped back to admire their hard work. The bathroom looked brand new, and they couldn’t wait to relax and enjoy their revitalized space.
Step 7: Completion and Aftercare
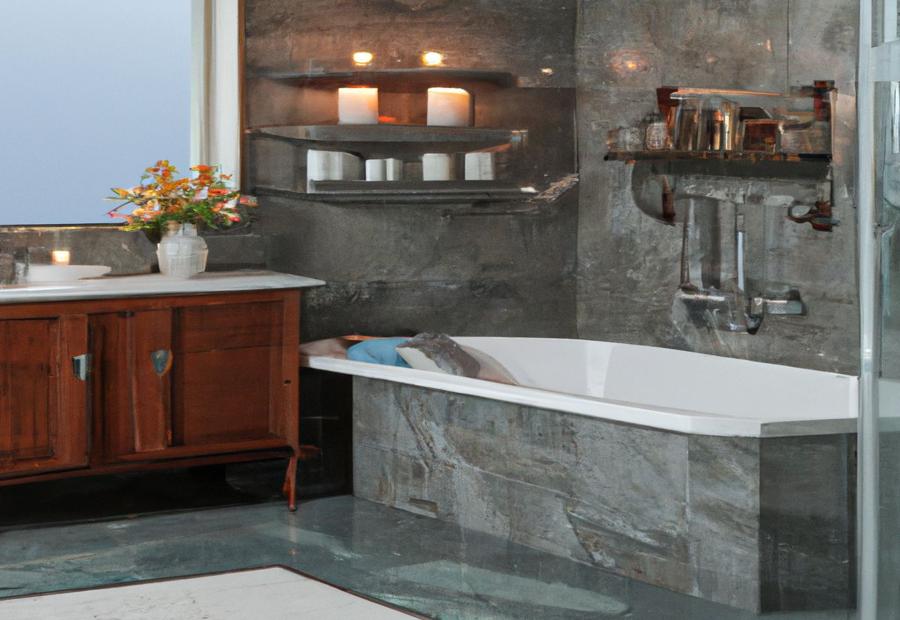
Photo Credits: Build-Wire.Com by Eric Ramirez
After completing the strenuous journey of bathroom renovation, it’s time for the final step: Completion and Aftercare. In this phase, we dive into inspecting and testing your newly renovated bathroom, ensuring everything works like a charm. But that’s not all! We’ll also share some crucial maintenance and upkeep tips to help you keep your bathroom looking spick and span for years to come. So, buckle up and get ready to put the finishing touches on your dream bathroom!
Inspecting and Testing Your Renovated Bathroom
When it comes to inspecting and testing your renovated bathroom, it is important to ensure that everything is in perfect working order and meets your expectations. Here are some steps to follow:
- Check the plumbing: Test all faucets, showers, and toilets to make sure there are no leaks or issues with water flow.
- Inspect the electrical system: Verify that all lights, switches, and outlets are functioning properly and safely. Consider hiring an electrician if needed.
- Test the ventilation: Turn on the exhaust fan and check that it effectively removes moisture and odors from the bathroom.
- Examine the tiling and flooring: Look for any cracks, uneven tiles, or loose flooring. Ensure that the grout and caulk are properly sealed.
- Check the fixtures and features: Make sure that towel bars, toilet paper holders, and other accessories are securely installed.
- Inspect the paint and wallpaper: Check for any peeling or chipping and ensure that the walls are smooth and evenly painted.
- Test the lighting: Turn on all the lights and ensure that they provide sufficient illumination in the bathroom.
Once you have completed these steps, your renovated bathroom should be ready for use and enjoyment. Remember to address any issues or concerns promptly to maintain the appearance and functionality of your newly renovated space.
Sarah recently renovated her bathroom and carefully followed the steps for inspecting and testing. However, a few days after completion, she noticed a small leak under the sink. Sarah promptly contacted her plumber and had the issue resolved, ensuring that her bathroom was in perfect condition. It’s always important to stay vigilant and address any unexpected issues to ensure a long-lasting and functional renovated bathroom.
Maintenance and Upkeep Tips
When it comes to maintaining and keeping your newly renovated bathroom in pristine condition, here are some useful maintenance and upkeep tips:
- Regular cleaning: Clean your bathroom regularly to prevent the buildup of grime, soap scum, and mildew. Use suitable cleaning products for different surfaces, such as a vinegar solution for glass and porcelain surfaces.
- Proper ventilation: Ensure adequate ventilation in your bathroom to prevent excessive moisture buildup, which can lead to mold and mildew growth. Use an exhaust fan or open windows after showers to allow air circulation.
- Sealant maintenance: Check the sealant around your tub, shower, and sink regularly. If you notice any cracks or gaps, reapply the sealant to prevent water leakage and potential damage to the surrounding areas.
- Preventative measures: Use shower curtains or glass doors to protect bathroom floors from excess water splashing. Install a shower mat to prevent slips and falls and place coasters or trays under toiletries to avoid staining countertops or surfaces.
- Inspect plumbing fixtures: Periodically check for any leaks or drips from faucets, showers, or toilets. Address any issues promptly to conserve water and prevent water damage to your bathroom and surrounding areas.
- Maintain grout and caulk: Inspect the grout between tiles and caulk around the edges of your bathroom regularly. Repair or replace any damaged or discolored grout or caulk to prevent water penetration and maintain a clean appearance.
- Pro-tip: Keep a squeegee in your bathroom to quickly remove excess water from shower walls and glass surfaces. This simple step can help minimize water spots and keep your bathroom looking immaculate.
Some Facts About “The Ultimate Guide to Bathroom Renovation: From Planning to Completion”:
- ✅ Renovating a bathroom can improve functionality, aesthetics, and overall home value. (Source: galwaydaily)
- ✅ Careful planning and execution are necessary for a successful outcome. (Source: galwaydaily)
- ✅ Determine goals before starting the renovation, considering reasons for the renovation, budget, and design preferences. (Source: galwaydaily)
- ✅ Assess the existing space and determine if any modifications are needed. (Source: galwaydaily)
- ✅ Evaluate plumbing and electrical systems and consider upgrades. (Source: galwaydaily)
Frequently Asked Questions
1. What are the different types of bathroom remodels?
There are four main types of bathroom remodels: surface-level, replacement, layout changes, and full remodels. Surface-level remodels involve making changes that only go skin deep, such as new fixtures and finishes. Replacement remodels involve swapping out one element in the bathroom for a new one. Layout changes remodels involve changing the layout of the bathroom, including moving plumbing fixtures. Full remodels completely transform every aspect of the bathroom, including reconfiguring the layout and adding new windows.
2. How do I create a realistic budget for my bathroom renovation?
Creating a realistic budget for your bathroom renovation involves researching costs and setting aside a contingency fund. Prioritize renovation elements and allocate more funds to critical areas. It’s also important to factor in potential hidden damages, plumbing work, electrical upgrades, and any customization or design preferences that may increase the cost.
3. Should I hire professionals for my bathroom renovation?
Yes, hiring professionals for your bathroom renovation is recommended. Research and compare quotes, expertise, and experience to find reliable contractors. They will ensure that the renovation runs smoothly, adhere to building codes and regulations, and deliver quality craftsmanship. Professionals can offer guidance, handle plumbing and electrical systems, and provide design recommendations based on your functional needs and style preferences.
4. What are some common mistakes to avoid during a bathroom remodel?
Some common mistakes to avoid during a bathroom remodel include underestimating storage needs, hiring the cheapest contractor, changing plans during the remodel, and skimping on materials. It’s important to plan carefully, stick to your budget, and communicate clearly with your contractor to minimize the risk of these mistakes.
5. How can I save money on a bathroom renovation?
To save money on a bathroom renovation, consider options like a surface-level update instead of a full remodel, reusing existing fixtures when possible, and comparing prices for materials and fixtures. It’s also important to prioritize upgrades that add overall value to your home and to avoid unnecessary additions or costly changes to plumbing and electrical systems.
6. What should I consider when selecting a vanity for my bathroom renovation?
When selecting a vanity for your bathroom renovation, consider the overall style update you want to achieve and whether you prefer a more functional or aesthetic focus. Reflect on your personal style and the coordinated accessories and bathroom linens you plan to use. Evaluate the available space and choose a vanity that fits well and meets your storage needs. Consider factors such as the material, durability, and ease of maintenance when making your decision.