
Building your own patio deck can be a rewarding and cost-effective project that adds value and comfort to your outdoor living space. Whether you’re an experienced DIY enthusiast or a beginner, this guide will take you through the step-by-step process of creating your own patio deck.
Designing Your Patio Deck involves crucial considerations such as choosing the right deck size and shape to fit your needs and available space. Making a material list is essential to ensure you have all the necessary supplies and tools on hand. Planning the layout and placement of your deck is crucial for creating a functional and aesthetically pleasing outdoor space.
Before you begin, gathering the necessary tools and materials is key to ensure a smooth construction process. This includes basic tools like a circular saw, drill, and level, as well as materials such as deck boards, posts, and hardware.
Preparing the site is an important initial step. Clearing the area and leveling the ground create a solid foundation for your deck. checking for permits and regulations in your area ensures compliance with local building codes and avoids any legal issues.
Next, building the foundation involves installing footings and posts to provide structural support. Attaching a ledger board to the house securely connects the deck to your home, ensuring stability and safety.
Once the foundation is in place, constructing the deck frame is the next step. This includes installing joists and beams, which provide the structure for supporting the decking boards. Adding support bracing further strengthens the frame.
The next stage involves installing the decking boards. Choosing the right decking material is important for durability and aesthetics. Cutting and fastening the boards carefully create a smooth and uniform surface.
After the deck construction is complete, finishing touches and maintenance are necessary to ensure longevity and a polished appearance. This includes trimming and sanding the deck, applying stain or sealant to protect the wood, and regular cleaning and inspection to maintain its condition.
By following this step-by-step process, you can confidently embark on the journey of building your own patio deck, creating a welcoming outdoor space for relaxation and entertainment.
Key takeaway:
- DIY patio decks maximize outdoor living space: Building your own patio deck allows you to create additional outdoor space for relaxation and entertainment.
- Proper planning and design lead to a successful patio deck: Choosing the right deck size, materials, and layout ensures that your DIY patio deck not only functions well but also enhances the aesthetics of your backyard.
- Maintenance is essential for a long-lasting patio deck: Regular cleaning, proper trimming, and applying sealant or stain will ensure that your DIY patio deck stays beautiful and durable for years to come.
[Keytakeaways with same html formatting in English Language]
Designing Your Patio Deck
Designing an incredible patio deck is no small task, but fear not, I’ve got you covered! In this section, we’ll dive into the art of crafting the perfect patio deck. From choosing the ideal size and shape to creating an impeccable material list and planning the ultimate layout, we’ll explore all the crucial elements you need to consider. So, grab your notepad and let’s embark on this journey to transform your outdoor space into a true haven.
Choosing the Right Deck Size and Shape
When selecting the appropriate size and shape for your patio, it is essential to take several key factors into consideration. First and foremost, measure the available space to determine the maximum deck size and shape that will fit.
Additionally, think about how you intend to use your deck. Will it primarily serve as a dining and entertainment area or as a space for relaxation and lounging?
Moreover, consider the number of individuals who will typically utilize the deck simultaneously. If you frequently host gatherings or have a large family, you may require a larger deck.
Furthermore, determine whether you desire a deck with multiple levels or distinct areas designated for specific purposes, such as dining or seating. It is also vital to think about the architectural style of your home and the surrounding environment.
Opt for a deck size and shape that complements the overall design and enhances your outdoor space. Lastly, take into account your willingness and ability to perform deck maintenance. Choose materials that are suitable for your climate and can withstand the elements.
By carefully analyzing these factors, you can make an educated decision and select the perfect deck size and shape that caters to your needs and preferences.
By carefully analyzing these factors, you can make an educated decision and select the perfect deck size and shape that caters to your needs and preferences.
Making a Material List
Making a Material List
To make a material list for your patio deck, follow these steps:
1. Determine the size and shape of your deck. This will affect the amount of materials needed.
2. Calculate the number of decking boards based on the dimensions of your deck. For example, if each board is 8 feet long and your deck is 16 feet wide, you’ll need at least 32 boards.
3. Consider the type of decking material you want to use, such as pressure-treated wood, composite decking, or hardwood. Each material has different costs and requirements.
4. Measure the length and width of your deck to determine the amount of joists and beams needed for support. Space them approximately 16 inches apart.
5. Calculate the number of support braces needed to reinforce the structure, depending on the size and layout of your deck. This ensures stability and durability.
6. Include any additional materials you may need, like screws, nails, brackets, and concrete for footings.
7. Consider adding extras such as railings, stairs, or decorative elements, and factor in the necessary materials for those additions.
Fact: Creating a detailed material list before starting your deck project helps you stay organized and ensures you have all the necessary supplies, saving time and hassle during construction.
Planning the Layout and Placement
Planning the Layout and Placement
When planning your patio deck, follow these steps:
1. Measure the available space to determine the size and shape of your deck.
2. Consider existing structures or obstacles that might affect deck placement.
3. Think about deck orientation in relation to sun and shade throughout the day.
4. Take into account desired features such as seating areas or barbecue stations.
5. Decide on entry points and access to the deck, considering flow from indoor to outdoor spaces.
6. Place the deck for privacy and an enhanced view, if applicable.
7. Consider proximity to utilities like water or gas lines if incorporating them into the deck design.
8. Ensure your deck layout complies with local building codes and regulations.
9. Draw a detailed plan of your deck layout, including measurements and additional features.
Fact: Proper planning of deck layout and placement ensures optimal functionality and enjoyment of your outdoor space.
Gathering the Necessary Tools and Materials
To gather the necessary tools and materials for building a patio deck, follow these steps:
1. List the tools and materials: Start by making a comprehensive list of all the tools and materials needed. This may include a circular saw, drill, level, measuring tape, deck screws, boards, and concrete mix.
2. Check your inventory: Take a look at your existing tools and materials to see if you already have any items on the list. This step will help you determine what you need to purchase.
3. Research suppliers: Find local suppliers that carry the tools and materials you require. It’s important to compare prices and quality to find the best options that fit within your budget.
4. Establish a budget: Determine the amount you are willing to spend on tools and materials. Consider investing in high-quality items as they will last longer and ensure the durability of your patio deck.
5. Purchase the tools: Visit the suppliers you have researched and buy the necessary tools, such as a circular saw, drill, and level.
6. Purchase the materials: Procure the required materials, including boards and deck screws, according to the specifications of your project. Keep in mind the size and layout of your deck when calculating the quantity of materials needed.
7. Organize and store: Once you have gathered all the tools and materials, arrange them in a safe and easily accessible area. This will make it more convenient to find and use them during the construction process.
In ancient times, people relied on primitive hand tools made from stones, bones, and wood to construct structures like patios. They would explore their surroundings and gather tools and materials from natural resources. As time progressed, humans developed more advanced tools and techniques, enabling them to build intricate and long-lasting structures. Today, we have the privilege of accessing a wide range of specialized tools and high-quality materials, which simplifies and streamlines the process of building a patio deck. By gathering the necessary tools and materials, we can undertake DIY projects and create beautiful outdoor spaces to enjoy for many years to come.
Preparing the Site
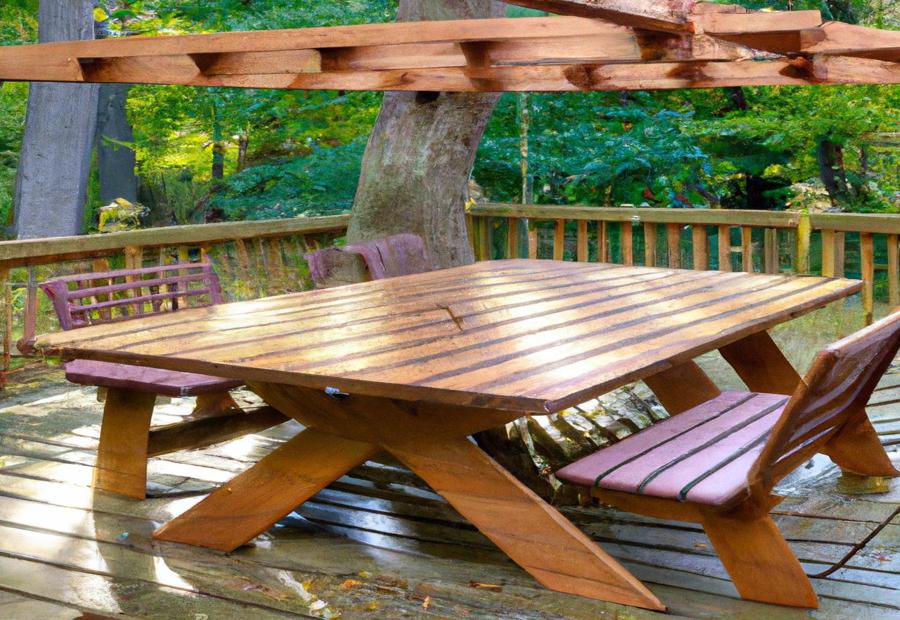
Photo Credits: Build-Wire.Com by Scott Torres
Get ready to create your dream patio deck! In this section, we’ll focus on preparing the site for your project. We’ll cover clearing the area and leveling the ground to ensure a solid foundation. Plus, we’ll explore the importance of checking for permits and regulations, so you can confidently move forward with your DIY endeavor. Get ready to roll up your sleeves and transform your outdoor space into a stunning retreat. Let’s dive in!
Clearing the Area and Leveling the Ground
When preparing your patio deck, it is important to clear the area and level the ground properly. Follow these step-by-step instructions:
1. Start by using appropriate tools to remove any vegetation and debris from the site.
2. Check the ground for slopes or unevenness. If necessary, adjust the soil by adding or removing it to create a level surface.
3. Use a tamper or plate compactor to compact the ground, ensuring a stable base for the deck foundation.
4. Improve drainage and prevent weed growth by installing landscape fabric.
5. For accurate dimensions, mark the deck boundaries using stakes and string.
6. Consider factors such as sun exposure, accessibility, and views when positioning your deck.
7. Use a measuring tape and stake to mark the locations for the footings or support posts.
8. Dig the necessary holes for the footings or support posts, following building codes and regulations.
9. Compact the soil at the bottom of each hole to create a solid base.
10. Before starting with the deck construction, double-check the levelness of the ground and make any necessary adjustments.
By following these steps, you can ensure that your deck is built on properly cleared and level ground, providing a sturdy foundation for your outdoor space.
Checking for Permits and Regulations
When constructing a patio deck, it is of utmost importance to thoroughly validate the presence of all necessary permits and regulations in order to ensure the legality of your construction endeavor. To achieve this, it is essential to observe the following steps:
- Conduct a comprehensive investigation of the local building codes to ascertain the specific permits that are mandatory for your project.
- Establish contact with the appropriate local building department to acquire the necessary application forms and undertake the vital documentation process.
- Accurately complete the permit application, giving precise information, and furnish all the requisite supporting documents.
- Submit the duly filled permit application, along with the applicable fees, to the appropriate department that oversees permit issuance.
- Refrain from commencing any construction activities until the permit has been officially approved and permission has been duly granted.
- Comply with the mandatory requirement to have the permit visibly displayed at the construction site throughout the duration of the project.
- Arrange for inspections at the designated stages as stipulated by the permits during the construction process.
- Swiftly address any concerns or issues that may arise during the inspections in order to avoid any potential complications.
- Maintain meticulous records of all permit-related documents, as well as the inspection reports, for future reference and record-keeping purposes.
By faithfully adhering to and implementing these aforementioned steps, you can effectively sidestep any legal entanglements or safety apprehensions that may arise while undertaking the construction of your patio deck.
Building the Foundation
When it comes to building your own patio deck, one of the most crucial stages is laying down the foundation. In this section, we’ll dive into the nitty-gritty of this process. We’ll cover topics like installing footings and posts, and how to properly attach the ledger board to your house. By understanding these key steps, you’ll be well on your way to creating a sturdy and long-lasting foundation for your dream deck.
Installing Footings and Posts
Installing Footings and Posts
When installing footings and posts for your patio deck, follow these steps:
1. Measure and mark the locations for the footings using a tape measure and stakes.
2. Dig holes for the footings using a post hole digger. The size of the holes will depend on the size and type of posts you are using. Refer to local building codes for requirements.
3. Pour concrete into the holes to create a solid base for the footings. Mix the concrete according to the manufacturer’s instructions using a wheelbarrow and shovel.
4. Place the post anchors or metal brackets into the wet concrete, ensuring they are level and aligned correctly.
5. Allow the concrete to cure for the recommended time specified by the manufacturer.
6. Attach the posts to the anchors or brackets using screws or bolts. Use a level tool to ensure the posts are plumb and level.
7. Secure the posts in place by attaching diagonal bracing from the top of the posts to the ground.
By following these steps, you can ensure a sturdy foundation for your patio deck by properly installing the footings and posts.
Attaching Ledger Board to the House
Attaching Ledger Board to the House
To attach a ledger board to the house when building a patio deck, follow these steps:
1. Choose a pressure-treated lumber ledger board that matches the joists’ width.
2. Position the ledger board against the house in the desired location, ensuring it is level and plumb.
3. Mark the pilot hole locations on the ledger board using a pencil or marker.
4. Drill pilot holes into the ledger board and the house’s exterior sheathing at the marked locations.
5. Tighten lag screws or structural screws through the pilot holes to securely attach the ledger board to the house.
6. Space additional lag or structural screws every 16 inches along the length of the ledger board.
7. Double-check that the ledger board is still plumb using a level and make necessary adjustments.
8. Once the ledger board is securely attached, proceed with constructing the rest of the deck according to your plans.
Attaching ledger boards to houses when building patio decks gained popularity in the late 20th century. This technique revolutionized the deck-building process, providing a secure and stable connection between the deck and the house. Prior to ledger boards, decks were often freestanding and prone to movement and instability. Ledger boards not only enhanced safety and durability but also allowed for creative designs and increased home value. Today, attaching ledger boards to the house is a common and essential step in building a patio deck.
Constructing the Deck Frame
Constructing the deck frame is a pivotal step in creating your own patio deck. From installing sturdy joists and beams to adding essential support bracing, this section will guide you through the crucial components of building a solid foundation for your outdoor oasis. Get ready to dive into the nitty-gritty details of deck construction and learn the key elements required to ensure stability and durability for your DIY project.
Installing Joists and Beams
Installing Joists and Beams
When installing joists and beams for your patio deck, follow these important steps:
1. Measure and mark the locations for joists and beams on the ledger board and support posts.
2. Cut the joists to the appropriate length according to your deck design.
3. Position the joists on the ledger board, ensuring even spacing and alignment with the outer edge.
4. Attach the joists to the ledger board using joist hangers and nails or screws. For more information on building your own patio deck, check out DIY: Building Your Own Patio Deck.
5. Install the beams by attaching them to the support posts using post caps and brackets.
6. Ensure the beams are level and aligned with the joists.
7. Add lateral bracing for additional support and stability to the deck structure.
8. Secure the bracing to the joists and beams using brackets or framing angles.
9. Double-check all connections and make necessary adjustments for stability.
It is crucial to follow manufacturer’s instructions and local building codes when installing joists and beams for your patio deck. Proper installation of these structural elements ensures deck stability and durability.
Adding Support Bracing
Adding Support Bracing
To add support bracing to your patio deck, measure the length and width of the deck frame to determine the number of bracing pieces needed. Cut the bracing pieces from pressure-treated lumber according to the measurements, ensuring they are long enough to reach from the joist to the beam. Position the bracing pieces diagonally between the joists and beams, starting from the corners and working towards the center of the deck. Secure the bracing pieces to both the joists and beams using galvanized deck screws or structural nails. Check that the bracing is properly aligned and perpendicular to the joists and beams, using a level for accuracy. Repeat this process for each bracing piece needed, making sure they are evenly spaced for optimal support.
Adding support bracing is crucial for the stability and strength of your patio deck. It prevents swaying or sagging and helps distribute the weight evenly across the structure. Following these steps ensures a secure and long-lasting deck. Always use high-quality materials and consult local building codes for specific requirements in your area.
Installing the Decking Boards
Photo Credits: Build-Wire.Com by Jack Lewis
Installing the decking boards is a crucial step in creating your own patio deck. It’s all about finding the perfect decking material that suits your style and needs. From selecting the right type of wood to the proper maintenance, we’ve got you covered. And once you’ve made your material choice, we’ll guide you through the process of cutting and fastening the boards, ensuring a sturdy and visually appealing deck for your outdoor oasis. Let’s dive in and bring your DIY deck dreams to life!
Choosing the Right Decking Material
Choosing the Right Decking Material
When choosing the right decking material for your patio deck, consider factors such as durability, maintenance requirements, and aesthetic appeal.
– Pressure-treated wood: This affordable option is treated with chemicals to resist decay, insects, and rot. However, it requires regular staining or sealing for longevity.
– Cedar: Known for natural beauty, cedar is resistant to decay and insects. It is also low-maintenance and can last for many years. However, it is more expensive than pressure-treated wood.
– Composite: Made from wood fibers and recycled plastic, composite decking offers the look of wood without the maintenance. It is highly durable, resistant to fading, and requires minimal upkeep. However, it can be more expensive.
– Hardwood: For a luxurious and exotic look, consider hardwood decking materials like ipe or tigerwood. They are extremely durable and resistant to rot and insects. However, they are more costly and require regular maintenance.
When choosing the right decking material, consider your budget, desired maintenance level, and the overall style you want to achieve. It’s important to weigh the pros and cons of each option. A well-chosen decking material will enhance the beauty of your patio deck and provide long-lasting enjoyment.
Cutting and Fastening the Boards
-
Edited
-
Cutting and Fastening the Boards
-
When cutting and fastening the boards for your patio deck, follow these steps:
-
– Measure and mark the boards: Use a tape measure to determine the desired length of each board. Clearly mark the measurements with a pencil.
-
– Cut the boards: Use a circular saw or miter saw to carefully cut the boards along the marked lines. Follow safety precautions and wear protective gear.
-
– Drill pilot holes: To prevent splitting, drill pilot holes slightly smaller than the diameter of the screws or nails you will use to fasten the boards.
-
– Attach the boards: Place the cut boards in their designated positions on the deck frame. Use screws or nails to secure the boards to the frame, starting from one end and working your way to the other.
-
– Ensure proper spacing: Use spacers or a deck spacing tool to maintain consistent gaps between the boards. This allows for proper drainage and wood expansion.
-
– Check for stability: Once all the boards are fastened, ensure they are securely attached and there are no loose or wobbly boards. Make any necessary adjustments or reinforcements.
-
By following these steps, you can successfully cut and fasten the boards for your patio deck, ensuring a sturdy and visually appealing result.
Finishing Touches and Maintenance

Photo Credits: Build-Wire.Com by Lawrence Miller
With the DIY patio deck almost complete, it’s time to add those finishing touches and ensure its long-lasting beauty. In this section, we’ll uncover the secrets to a perfectly trimmed and sanded deck, discover the transformative power of stain or sealant application, and reveal the importance of regular cleaning and inspection for maintaining your deck’s integrity. Get ready to bring your outdoor oasis to life with these essential tips and tricks for the ultimate patio deck.
Trimming and Sanding the Deck
Trimming and sanding a deck properly is an important process that can enhance its appearance and longevity. To accomplish this, follow these steps:
1. Begin by preparing the deck area. Clear the deck of all furniture, plants, and objects to create ample workspace.
2. Thoroughly inspect the deck for any loose boards, nails, or screws that require tightening or replacement prior to trimming and sanding.
3. Carefully trim the edges of the deck boards using either a circular saw or hand saw. This will ensure a neat and uniform appearance, eliminating any overhanging or uneven edges.
4. The next step involves sanding the surface of the deck. Use coarse-grit sandpaper to eliminate rough spots, splinters, or stains on the deck boards. For a smooth finish, remember to sand in the same direction as the wood grain.
5. Once rough areas have been addressed, switch to finer grit sandpaper. This will further refine the deck surface, providing a polished look and improved comfort.
6. After sanding, it is crucial to clean the deck properly. Use a broom or vacuum to remove any dust or debris, ensuring a clean surface.
7. For added protection and an enhanced appearance, consider applying a stain or sealant to the deck. Follow the product instructions to achieve the desired results.
8. To maintain the deck’s condition, engage in regular maintenance practices. Sweep away debris, promptly address stains or spills, and inspect for any signs of damage or wear.
By following these steps, you can create a visually appealing outdoor space with a smooth, well-maintained deck. Remember to prioritize safety by taking necessary precautions when using power tools or working at heights.
Applying Stain or Sealant
Applying Stain or Sealant
When applying stain or sealant to your patio deck, follow these steps for optimal results:
1. Clean the deck: Thoroughly clean the deck and remove dirt, debris, and any previous finishes. Use a deck cleaner and a scrub brush or pressure washer to remove built-up grime.
2. Prepare the surface: Sand rough spots or splintered areas on the deck surface using sandpaper or a power sander. This will help the stain or sealant adhere evenly and ensure a smooth finish.
3. Choose the right product: Select a suitable stain or sealant for your type of deck wood and desired level of protection. Consider factors such as UV resistance, water repellency, and color options.
4. Apply the stain or sealant: Use a brush, roller, or sprayer to apply a thin and even coat of stain or sealant to the entire deck surface. Work in small sections to prevent overlap and ensure consistent coverage. Follow the manufacturer’s instructions for drying and reapplication if needed.
5. Allow for proper drying: Give the stain or sealant enough time to dry and cure completely before allowing foot traffic or placing furniture on the deck. Drying time may vary depending on the product and weather conditions.
6. Maintain regular upkeep: To prolong the lifespan of your stain or sealant, regularly clean and maintain the deck. This may include periodic reapplication of the product to protect the wood from weathering and UV damage.
By following these steps, you can effectively apply stain or sealant to your patio deck, enhancing its appearance and protecting it from the elements.
Regular Cleaning and Inspection
Regular cleaning and inspection are essential for maintaining the longevity and safety of your patio deck. To ensure the optimal condition of your deck, follow these steps:
- Remove debris: Sweep or use a leaf blower to clear leaves, dirt, and debris from the deck surface.
- Inspect for damage: Regularly check for wear, such as loose nails, damaged boards, or splintered wood. Whenever necessary, promptly replace or repair these issues.
- Clean the deck: Utilize a suitable deck cleaner to effectively remove dirt, mildew, and stains. Adhere to the instructions provided and consider using a scrub brush or power washer for deeper cleaning if required.
- Inspect the railing: Thoroughly examine the railing for any loose or damaged parts. Enhance stability by tightening screws or replacing sections that are compromised.
- Check for mold or mildew: Always be on the lookout for signs of growth. If mold or mildew is present, promptly clean the affected areas using a dedicated remover and take preventative measures to prevent future occurrences.
- Inspect the stairs: Regularly check for any loose or broken parts in the stairs. By promptly repairing or replacing any damaged components, you can prevent accidents and ensure safety.
- Check for rot: Pay special attention to the deck boards, particularly in areas near the ground or prone to moisture. Look out for signs of rot and promptly replace any weakened or rotten boards.
- Apply a sealant: Consider applying a sealant or stain after completing the cleaning and inspection process. This will enhance the deck’s appearance while also providing protection.
- Regularly repeat the cleaning and inspection process: Schedule annual cleaning and inspection sessions to ensure the ongoing maintenance of your deck. By addressing any issues early on, you can prevent potential damage and prolong its lifespan.
Fact: Regular cleaning and inspection not only extend the lifespan of your patio deck but also prevent damage, creating a safe and enjoyable outdoor space.
‘nn
Some Facts About Building Your Own Patio Deck:
n
- n
 Building your own patio deck can save you money compared to hiring a contractor.
- It is important to keep the deck building process simple and easy.
- Pressure-treated wood or pallet boards are inexpensive options for deck boards.
- Imported hardwood like ipe is a more expensive but durable option for deck boards.
- A small, simple on-grade deck can be built with basic carpentry tools and some sweat equity.
n
n
n
n’
Frequently Asked Questions
FAQ: What are the benefits of building your own patio deck?
Answer: Building your own patio deck allows you to save money compared to hiring a contractor. It also gives you the freedom to customize the design and add features that suit your preferences and needs.
FAQ: What are the options for deck boards when building a patio deck?
Answer: When building a patio deck, you have several options for deck boards. Pressure-treated wood or pallet boards are inexpensive choices, while imported hardwood like ipe is a more expensive but durable option.
FAQ: Do I need building permits for a patio deck?
Answer: Ground-level decks are easier to build and do not typically require building permits. However, it’s important to check your local building codes and regulations to ensure compliance.
FAQ: What are some tips for building a simple and easy patio deck?
Answer: To make the deck building process simple and easy, it’s recommended to keep the dimensions manageable, use basic carpentry tools, and choose a fastening system like hidden fasteners. Starting with a ground-level or floating deck can also simplify the construction process.
FAQ: Can I build a patio deck with limited carpentry experience?
Answer: Yes, building a patio deck can be a DIY project that doesn’t require extensive carpentry experience. With the right techniques, materials, and some sweat equity, anyone can tackle this project.
FAQ: How can I protect the ledger when building a patio deck?
Answer: To protect the ledger, cover the exposed sheathing with waterproof membrane and use metal flashing. This helps to prevent water damage and extends the lifespan of the deck structure.